Recently I was browsing the internet for ideas for homemade Christmas ornaments and found a tutorial for making superhero ornaments. Now, if you think “Meh, superheroes aren’t my thing, this post isn’t for me.” Stop right there. These certainly wouldn’t have to be superhero ornaments – as you’ll see, only two of mine actually are. The idea is so simple, and yet, I never would have come up with it on my own.
To check out the source I used as inspiration, check out “Happy Looks GoodOn You”.
The supplies you need are pretty basic:
·
Access to Google images (or I suppose stickers
would work) and a colour printer
·
Clear ornaments (I used plastic because they
were for kids but glass would work too)
·
Acrylic paint
·
A pair of scissors or a knife to cut the decals
·
Mod Podge
·
Something on which to let them dry (the tutorial
suggested empty toilet paper rolls but in half, I used newspaper and a couple
blocks of wood)
·
A small paintbrush or sponge


Once I had the paint covering the inside completely I
carefully set the ornaments upside-down between the two blocks of wood
(newspaper underneath) to allow the excess paint to run out. I let them sit like that for a couple of
hours. The sparkly one could have been
left overnight.

While the paint was drying, I cut out my images. For the more detailed pictures I actually
used an “exacto” knife and a cutting mat so that I could include all the details.
Once the paint seemed dry and there were puddles under
the ornaments on the paper, I podged the back of each image and stuck them onto
the balls. After giving them some time
to dry, I podged over top as well so that they’d stay in place and would be difficult to pick off. Thanks to hubby for modeling the process for
the picture:

I let them sit (upside down just in case) until the podge
was dry, and then replaced the toppers.
I didn’t super glue the topers in place, but I think if I were doing it
again, I would have. I’m pretty pleased
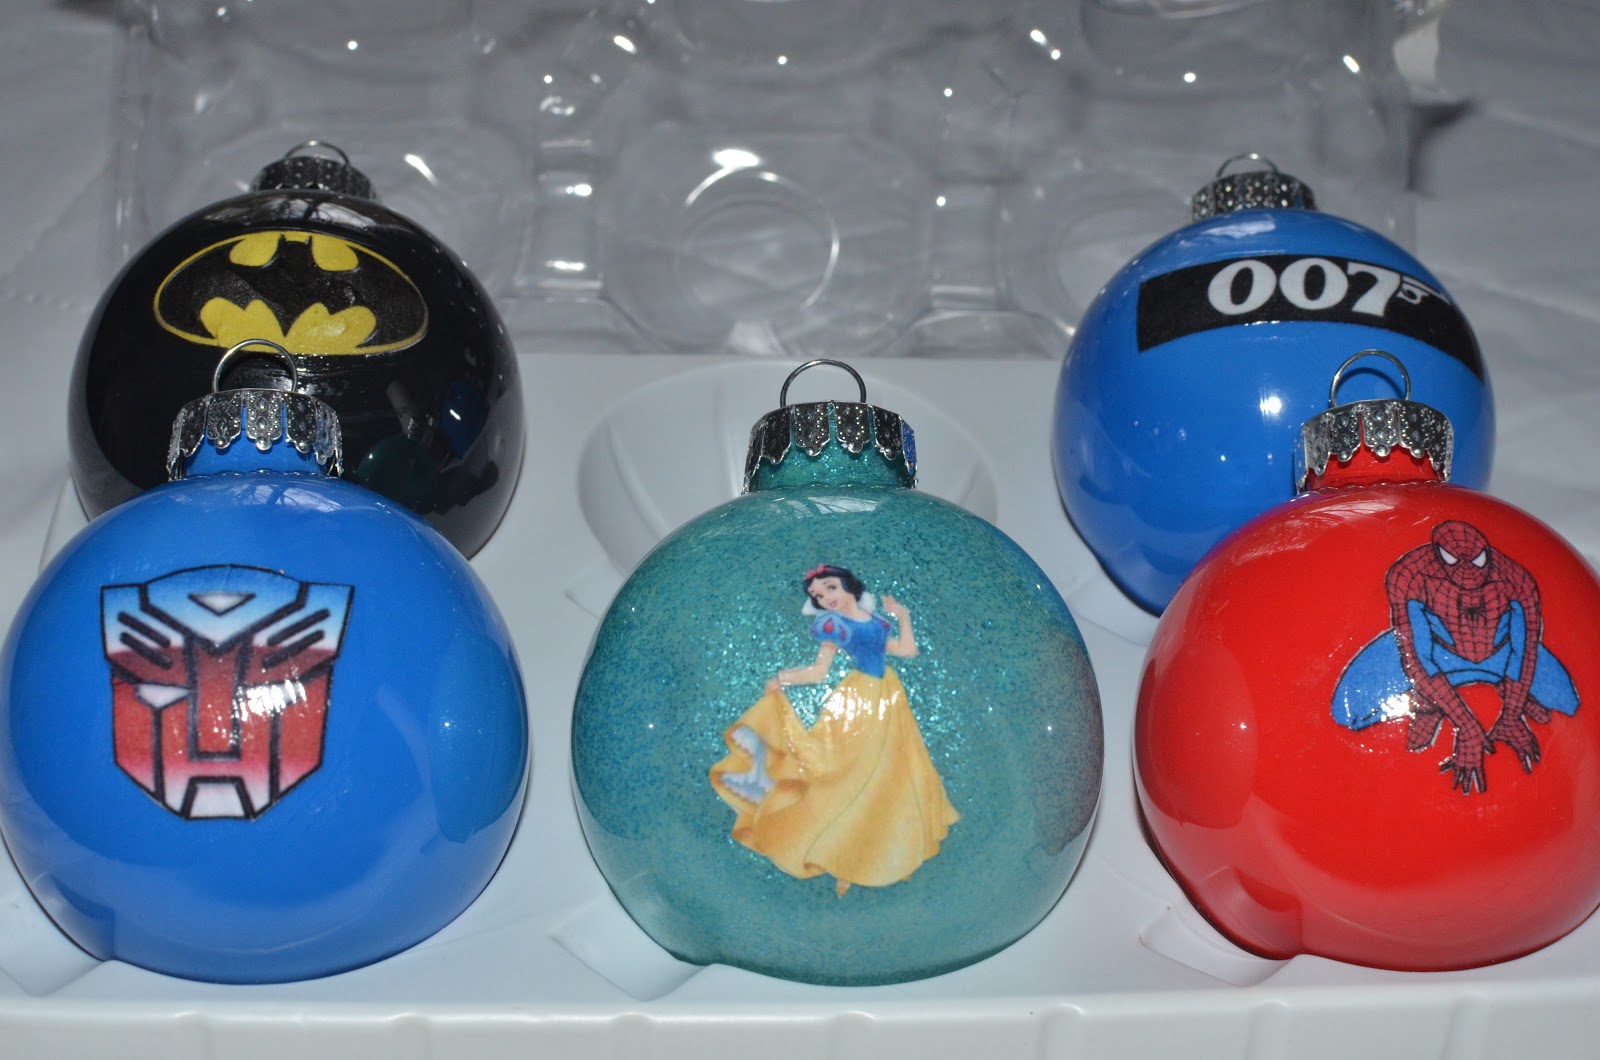
with the final result, and they seemed to be a hit with the kids!
Happy crafting!
~ Shannon
hi! I love this idea! did you mod podge over the entire ball though? or just over the little paper logo?
ReplyDelete